
Authentication with Google Sign-In is a common practice in modern applications. In this blog post, we will discuss how to integrate Google Identity Services into any of your frontend applications that use Ruby on Rails as the server. Google Identity Services provides with
**Customized Sign In/Sign Up Button **
One Tap Sign In
Let's dive in!!
Step 1: Create an application in the Google Developer Console.
In order to use Google Sign In or One Tap, we need a client_id to add in our client as well server.
To create an application, head to the Google Developer Console
Select Create Credentials > OAuth Client ID. Before doing this you need to configure your consent screen.
When creating the client_id, make sure to include localhost & the port on which your client is running in the Authorized Javascript Origin for development & your production URL.
Once done, you will have your client_id of the form
1234567890-abcdefg.apps.googleusercontent.com
For more details on setting up the application, you can read here
Step 2: Setting up the Library in Client
In order to load the client library, add <script src="https://accounts.google.com/gsi/client" async defer></script> in your index.html if you are using React.js or _app.jsx if using Next.js
Step 3: Displaying the customized Sign In Button
  useEffect(() => {
    /* global google */
    google.accounts.id.initialize({
      client_id:
        "YOUR_GOOGLE_CLIENT_ID",
      callback: signInCallback,
      cancel_on_tap_outside: false,
    });

    google.accounts.id.renderButton(document.getElementById("signInDiv"), {
      theme: "outline",
      size: "large",
    });
  }, []);
- global google is added to show that google has been defined globally in our
index.html
google.accounts.id.initialize ``` method creates a Sign In With Google client instance based on given fields. client_id is a required field that we get from creating the google application, callback is the JavaScript function ( here signInCallback) that handles the ID token returned from the One Tap prompt or the pop-up window.
- By default, if a user clicks anywhere on the screen, an exponential cool-down is applied on the One Tap prompt. In case you want the prompt to be always visible, set this value to false. You can take a look at more configurations here.
google.accounts.id.renderButton ``` method renders a Sign In With Google button. You can play around with the configurations here.
document.getElementById("signInDiv") ``` is the HTML element. By adding the below code to your web page HTML,
return (
    <div className="App">
      <div id="signInDiv" />
    </div>
  );
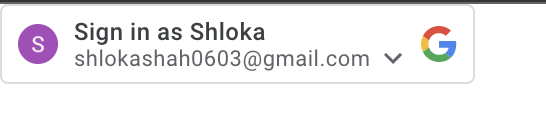
you will be able to see a customized button like this
Step 4: Displaying the One Tap Prompt
- In order to show the prompt, add this in the useEffect
google.accounts.id.prompt();
Step 5: Defining the callback function
- As mentioned in Step 3, signInCallback, is our callback function which can be defined as
 const signInCallback = (result) => {
    if (result.credential) {
      const params = { token: result.credential };
      axios
        .post("http://localhost:3000/user/google", params)
        .then((res) => {
          const { authToken, ...userInfo } = res.data.data;
          // set token in local storage/cookies based on your authentication method
         // redirect to the authenticated page
        })
        .catch((err) => console.log(err));
    }
  };
where,
http://localhost:3000/user/google is a server URL that we will create in the next step
The result is a response from Google once we click on the Sign In or One Tap button.
The result comprises two fields
credential: This field is the ID token as a base64-encoded JSON Web Token (JWT) string
select_by: showing how the credential is selected. More about it here.
We take the credential from the result & pass it as a param to our server.
Step 6: Adding the controller & route to Server
We will create a route in the server to handle the request from the client. Before we do that, we need to create a controller that will accept the JWT from the client.
Create a file,
app/controllers/users/user_controller.rb, add a methodgoogle.add the route users/user#google_oauth, in config/routes.rb.
Once, the route receives the JWT, the first & the most important step is to verify if the JWT is validated. For this purpose, we can use the gem google_auth, which is the official gem from Google to verify the ID tokens issued.
This can be done easily using
Google::Auth::IDTokens.verify_oidc access_token, aud: "YOUR_GOOGLE_CLIENT_ID"where,access_token is the JWT received from the client.
aud is google application client id.
If the token is valid, it will return a hash like this or throw an exception
{
  "iss": "https://accounts.google.com",
  "nbf": 12345678,
  "aud": "YOUR_GOOGLE_CLIENT_ID,
  "sub": "1112223333444",
  "email": "your-email@gmail.com",
  "email_verified": true,
  "azp": "YOUR_GOOGLE_CLIENT_ID",
  "name": "First Last",
  "picture": "https://lh3.googleusercontent.com/a/AItbvmnvsIQFJw",
  "given_name": "First",
  "family_name": "Last",
  "iat": 1653797115,
  "exp": 1653805725,
  "jti": "8ffa19190gngd46745ff558821f953802"
}
- If the token is valid, you can check in your database whether the user exists or not and accordingly create a user. Once that is done, you can sign the user in or redirect them based on your authentication method.
# users/user_controller.rb
def google
  begin
    data = Google::Auth::IDTokens.verify_oidc access_token, aud: "YOUR_GOOGLE_CLIENT_ID"
    // find the user in the data
    // if the user does not exist, create a user using data
    // sign the user (based on your authentication method)
  rescue StandardError => e
  end
end
# config/routes.rb

scope :user do
  post 'google' => 'users#user_controller.rb'
end
PS : Make sure to have rack-cors installed in your server and add this application.rb config.middleware.insert_before 0, Rack::Cors do allow do origins '*' resource( '*', headers: :any, expose: ['Authorization'], methods: %i[get patch put delete post options show] ) end end
to avoid facing errors like this

PPS : If your application uses the Google Sign-In JavaScript Platform Library for web, make sure to migrate it to Google Identity Service since the former is going to be deprecated. Link
Hope this article helps you integrate One Tap Login into your projects. For more detailed information you can check out the official docs.
Comments
Join the discussionNo comments yet. Be the first to comment.
